 There are now three ways to expand your network: by adding new Hubs, by adding new Receivers, or with an AyrMesh Bridge. Which to use?
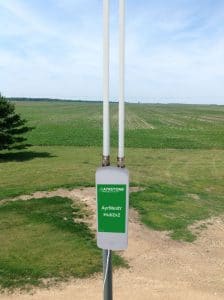
The key difference between the units is that the Hub is a higher-power omnidirectional device that CREATES a WiFi Access Point (that you can connect to with your laptop, tablet, smartphone, or AyrMesh Receiver). The Receiver USES the Hub’s WiFi Access Point, but doesn’t actually CREATE a signal that anything else can connect to – it provides an Ethernet port to connect devices. The Bridge radios use a different, non-WiFi signal for communications.

One thing that the Hub and the Receiver have in common is that they both have an Ethernet port to which you can connect a wired (Ethernet) device, like a computer, the IndoorHub, a camera, or just about any other network device and have it appear on the network.
In general, you want Hubs to be far apart, and to use just enough of them to provide the coverage you want on the farm. Use Receivers to bring the signal into buildings or to connect devices that don’t have a WiFi radio (or are too far away from the Hub to connect using WiFi.)
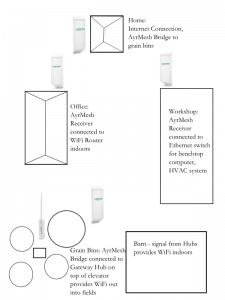
For instance, let’s consider a simple farm yard (click to make full size):
The first unit, of course, is always the Gateway Hub – it connects to your router and is the foundation for your network, and, as long as it’s mounted outside, high, and in the clear, it will provide WiFi for a long distance outside.
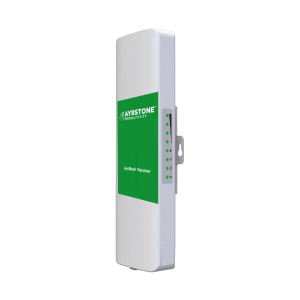
However, in this case, both the office and Workshop are metal buildings, so even the Gateway Hub’s powerful signal can’t get inside. In these cases, we use the AyrMesh Receiver to bring the network inside. In the business office, we connect an IndoorHub and a Switch to provide wired and WiFi connectivity indoors. In the workshop, we just use an Ethernet switch, because the only devices that needed to be connected were wired.
In order to provide a WiFi signal out into the fields, we mount a Remote Hub onto the top of the elevator – about 50′ high. This gives the Hub maximum range, so we can then place additional Hubs in nearby fields (up to 2.5 miles away – using battery power and solar panels for charging) to provide a constant “cloud” of WiFi across the fields. This also provides a signal into the wooden barn – WiFi signals will pass through wood, although it does weaken them considerably – so the grower can use his smartphone and tablet while working inside. Finally, it provides an Ethernet port that he can use to connect his network-enabled grain dryer to the network, allowing him to control the grain dryer from anywhere on the farm or, potentially, anywhere in the world. This way he can be out in the fields combining and adjusting the grain dryer without having to come back to the farmyard.
 However, that option uses a “hop” from the Gateway to get to the Hub on the grain elevator, thereby reducing the total possible range of the network (because you only want to go three “hops” from the Gateway – see this article for more information). In this case, the grower opted to use a Bridge to put the Gateway Hub up on the grain elevator and add another “ring” of Hubs in the fields to cover more ground (click on the graphic to see it at full size).
Because the Hub is up high above the farmyard, all the Receivers can still easily receive the signal (although they had to be repositioned to point at the grain elevator instead of the house).
 This, of course, is just a small example to get you started. Once you build the network, you will find a variety of uses for it, from monitoring systems (networked weather stations to let you see rainfall in distant fields, temperature and humidity sensors to tell what’s happening in your buildings, cameras so you can see your livestock from bed) to control (turning up the heat in the workshop from your tractor, printing a document on your office printer from town, turning off an irrigation system without going outside).
